Field Notes
How an Artistic Terrazzo Floor is Made

Remember walking down the hallway of your elementary school? That floor was probably terrazzo — cementitious terrazzo. Now imagine a bright color in place of that gray cement. Now imagine a design in that floor with lots of beautiful shapes and color harmonies. Now imagine that design is something more than decoration — with imagery and metaphor emerging, attuned to the building, the people in it, the landscape outside, the history of the place. A hallmark, an identity. That is artistic terrazzo, and that is where this page begins.
Terrazzo is not applied to a surface. It is the surface. The marble, the glass, the stone — all the aggregates that go into the epoxy mix — are bound together, poured in place, ground and polished until what was raw material becomes something luminous and permanent. A well-made terrazzo floor will outlast the building it sits in.
Design

Every terrazzo commission begins with listening. Before I draw anything, I try to understand the building — its architecture, its purpose, the people who will use it, and the geography of the landscape outside it. I visit the site. I read about the place. I look at maps. I ask questions that might seem far from the floor itself: What research happens here? What is the history of this land? What will travelers feel when they arrive? Like watching clouds float by, sometimes the floor plan itself suggests a shape, an animal.
One of the first things I ask the architect is: what is the gesture of the building? Why does the building look the way it does? What is the meaning behind it? Some architects answer immediately. Others pause. Either way, the answer, or the search for it, shapes everything that follows. The floor should not decorate the building. It should complete it. In my last terrazzo proposal, an arena, I asked can this floor physically interact with the glass curtainwall surrounding it. The result was a design that responded to the movement of the sun and change of the seasons.
I love to go deep into the research—reading, looking, absorbing everything I can find about the place, the building, the people, the landscape, the history. Then I stop. I play guitar, live my life, let it settle. What I pay attention to is what percolates up later—not insistently, but quietly, like a whisper that says look at me for a moment, I might have something to say. An artist learns to trust that small voice. It is a kind of learned intuition, and it is as reliable as anything more deliberate.

The painter Sean Scully once said that what fascinates holds your attention because somehow it’s right and somehow not right. It communicates without explaining, without justifying. That is what I am looking for in a design. Some terrazzo designs fail because they are not interesting in this way, they are just a picture of something. Too obviously trying to be something, the reach is too narrow. People can spend years and years in a building. A floor design becomes memorable if it is layered in its meaning, slowly revealing other possibilities and connections over time. What I am after is a floor with enough mystery that it keeps calling you back, that rewards the person who stops and looks, and the person who comes back tomorrow and looks again.
Shop Drawings

Once the design is approved, I provide the contractor with vector files which are precise digital drawings that become the basis for shop drawings. The contractor will either print these drawings at full scale or program a waterjet machine to cut the divider strip directly from them.
Fabricating Divider Strip and Embeds
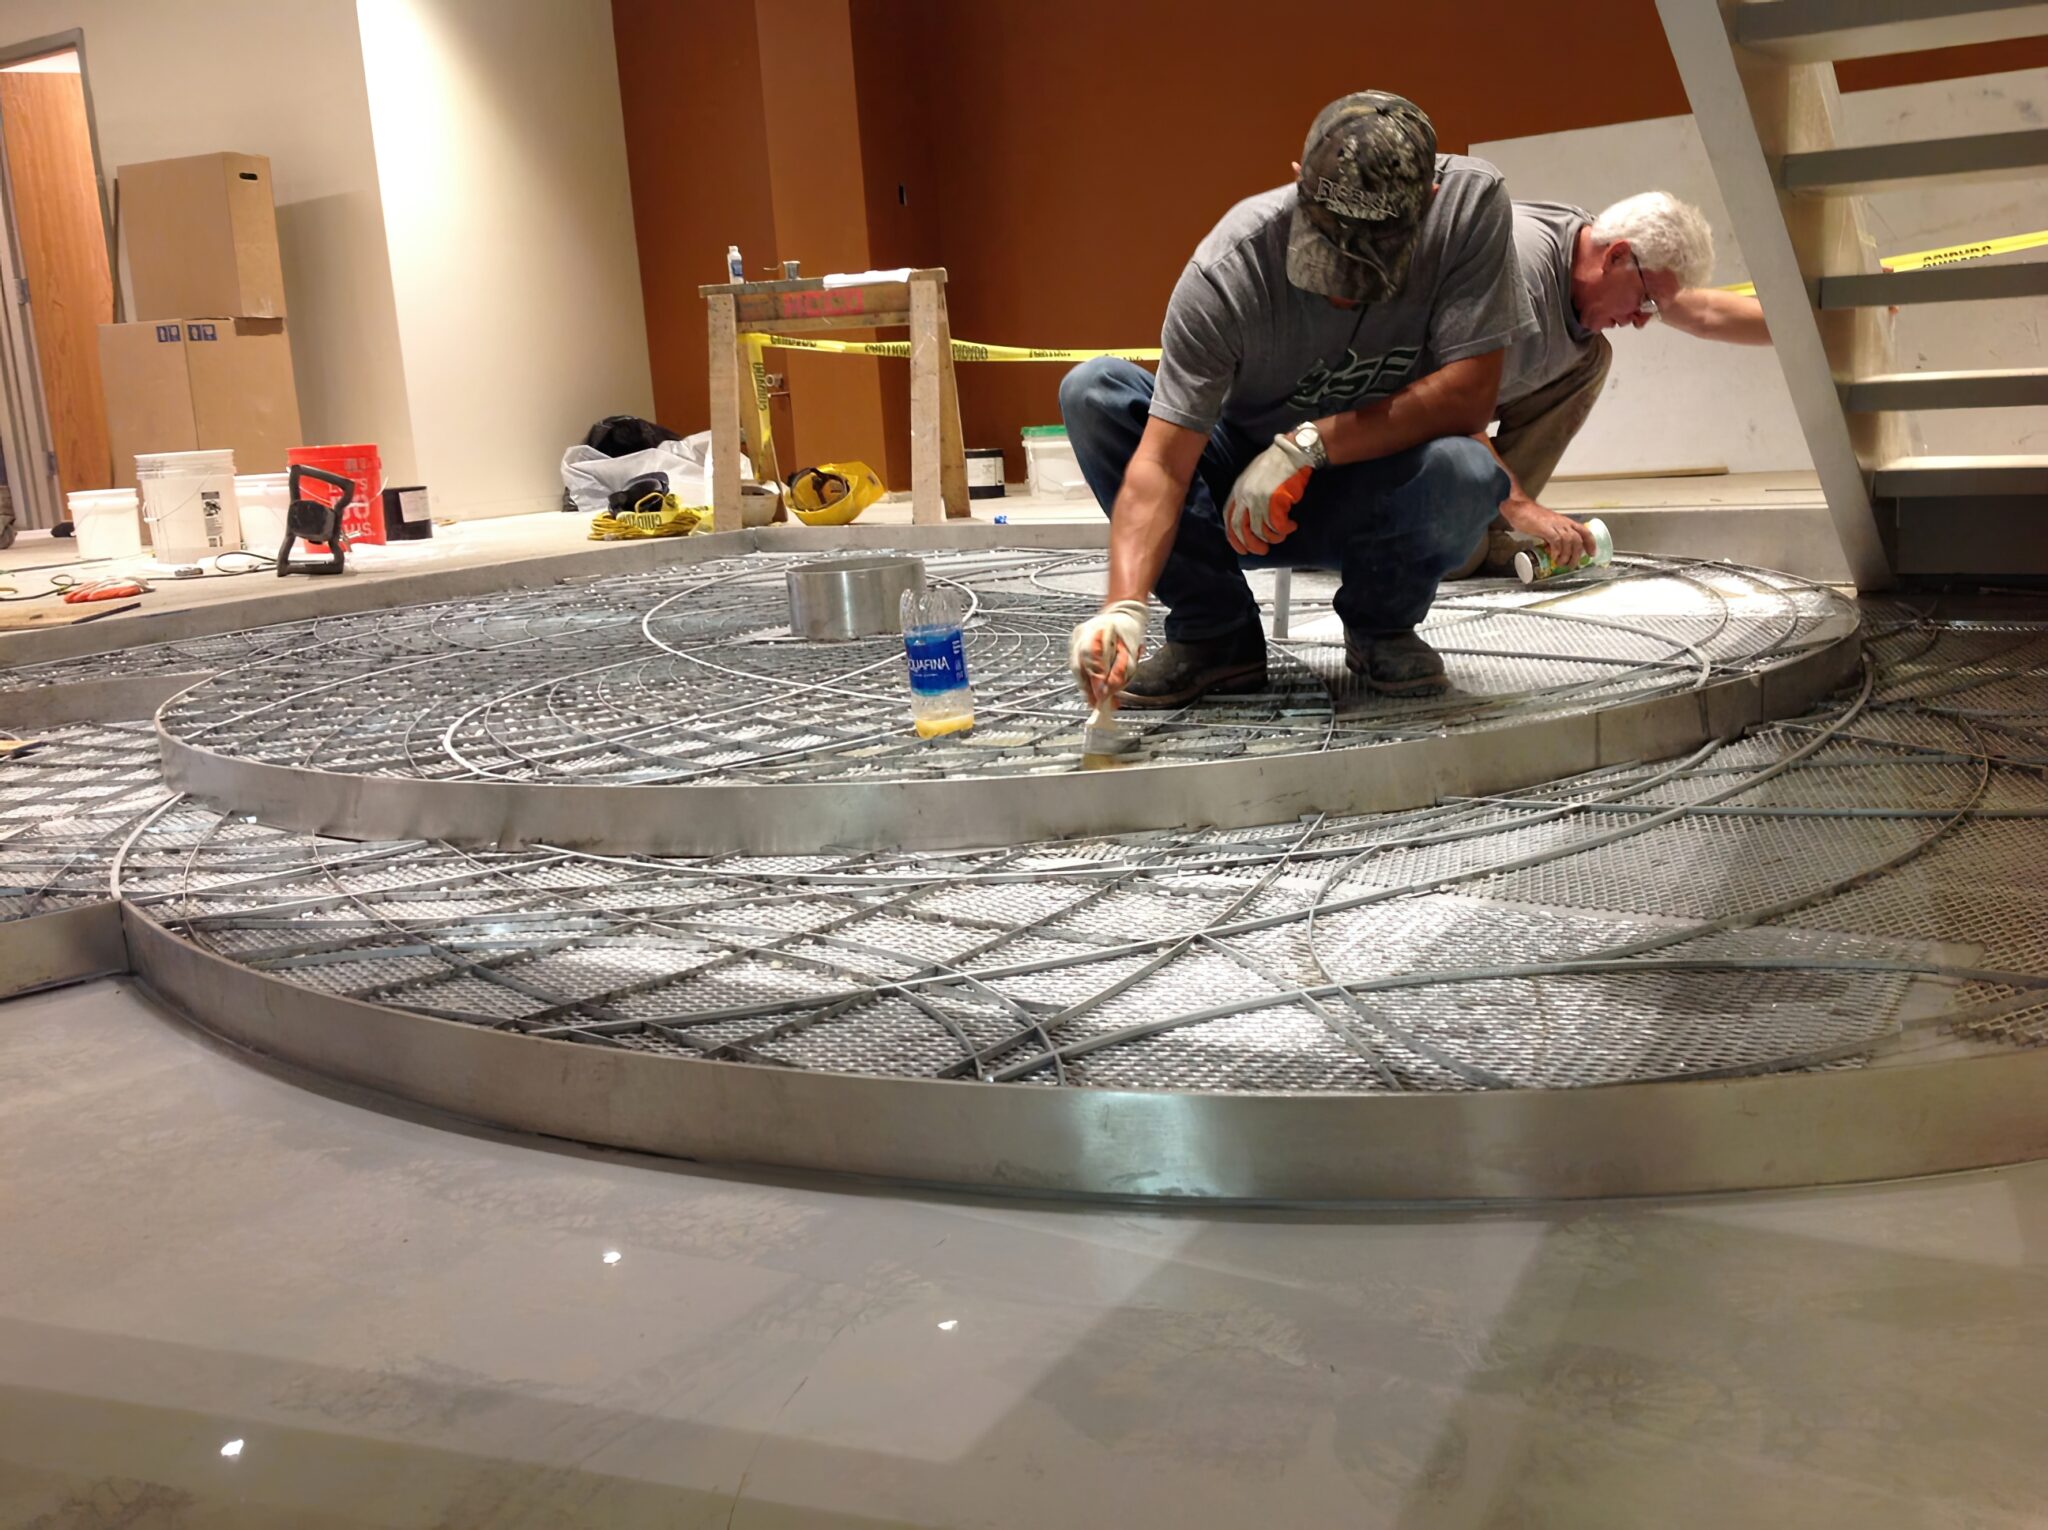
A terrazzo floor is something like a giant coloring book. The divider strip is the line work: brass, zinc, aluminum, and/or plastic are set into the floor before any epoxy is poured, defining every field of color in the composition. The thickness and material of the strip are design choices: strip can be narrow and nearly invisible, or wide enough to read as a bold element in the composition. A waterjet machine can also cut a line that varies in width throughout, something closer to a calligraphic stroke, which can be beautiful.

A waterjet machine produces a very fine spray at a very high pressure, like 40,000 psi. The water that is sprayed is combined with a finely-ground garnet material, usually ruby. The ruby powder is what provides the abrasive to cut the material. I am told that a waterjet machine can cut through 6-inches of stainless steel. You guide the cutting by inputting a vector line drawing. I am able to achieve some amazing geometric sequences that way where perhaps six or eight lines converge into a single point. Here you see a baby sea turtle being cut out of an aluminum sheet.
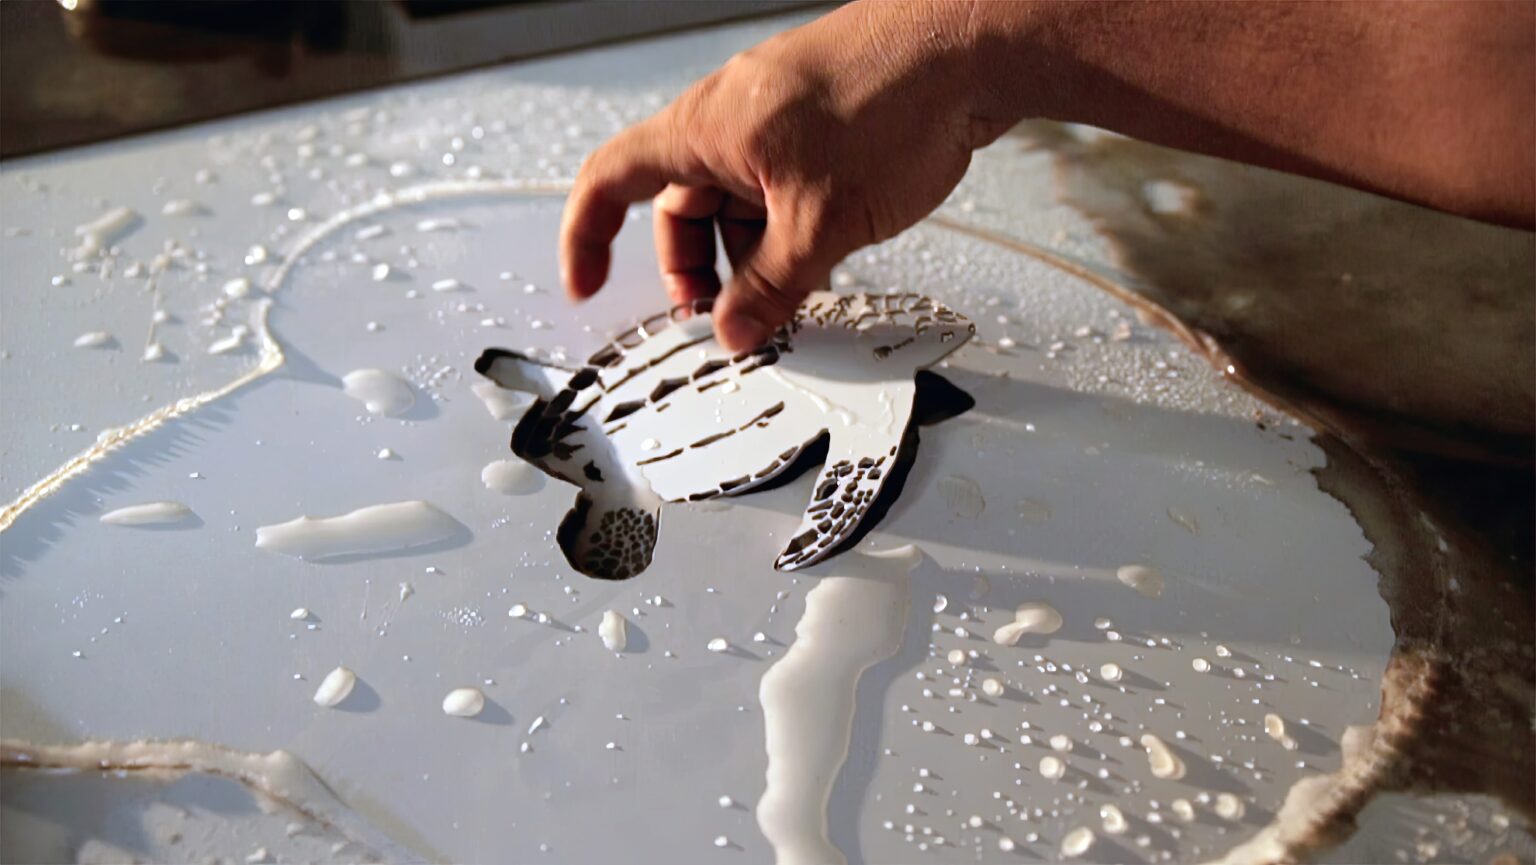
There are several ways to fabricate and install the strip. It can be cut by waterjet and assembled off site, bent and shaped by hand and soldered to a metal mesh backing, or scribed and set directly on site from a full-scale printed cartoon of the design.
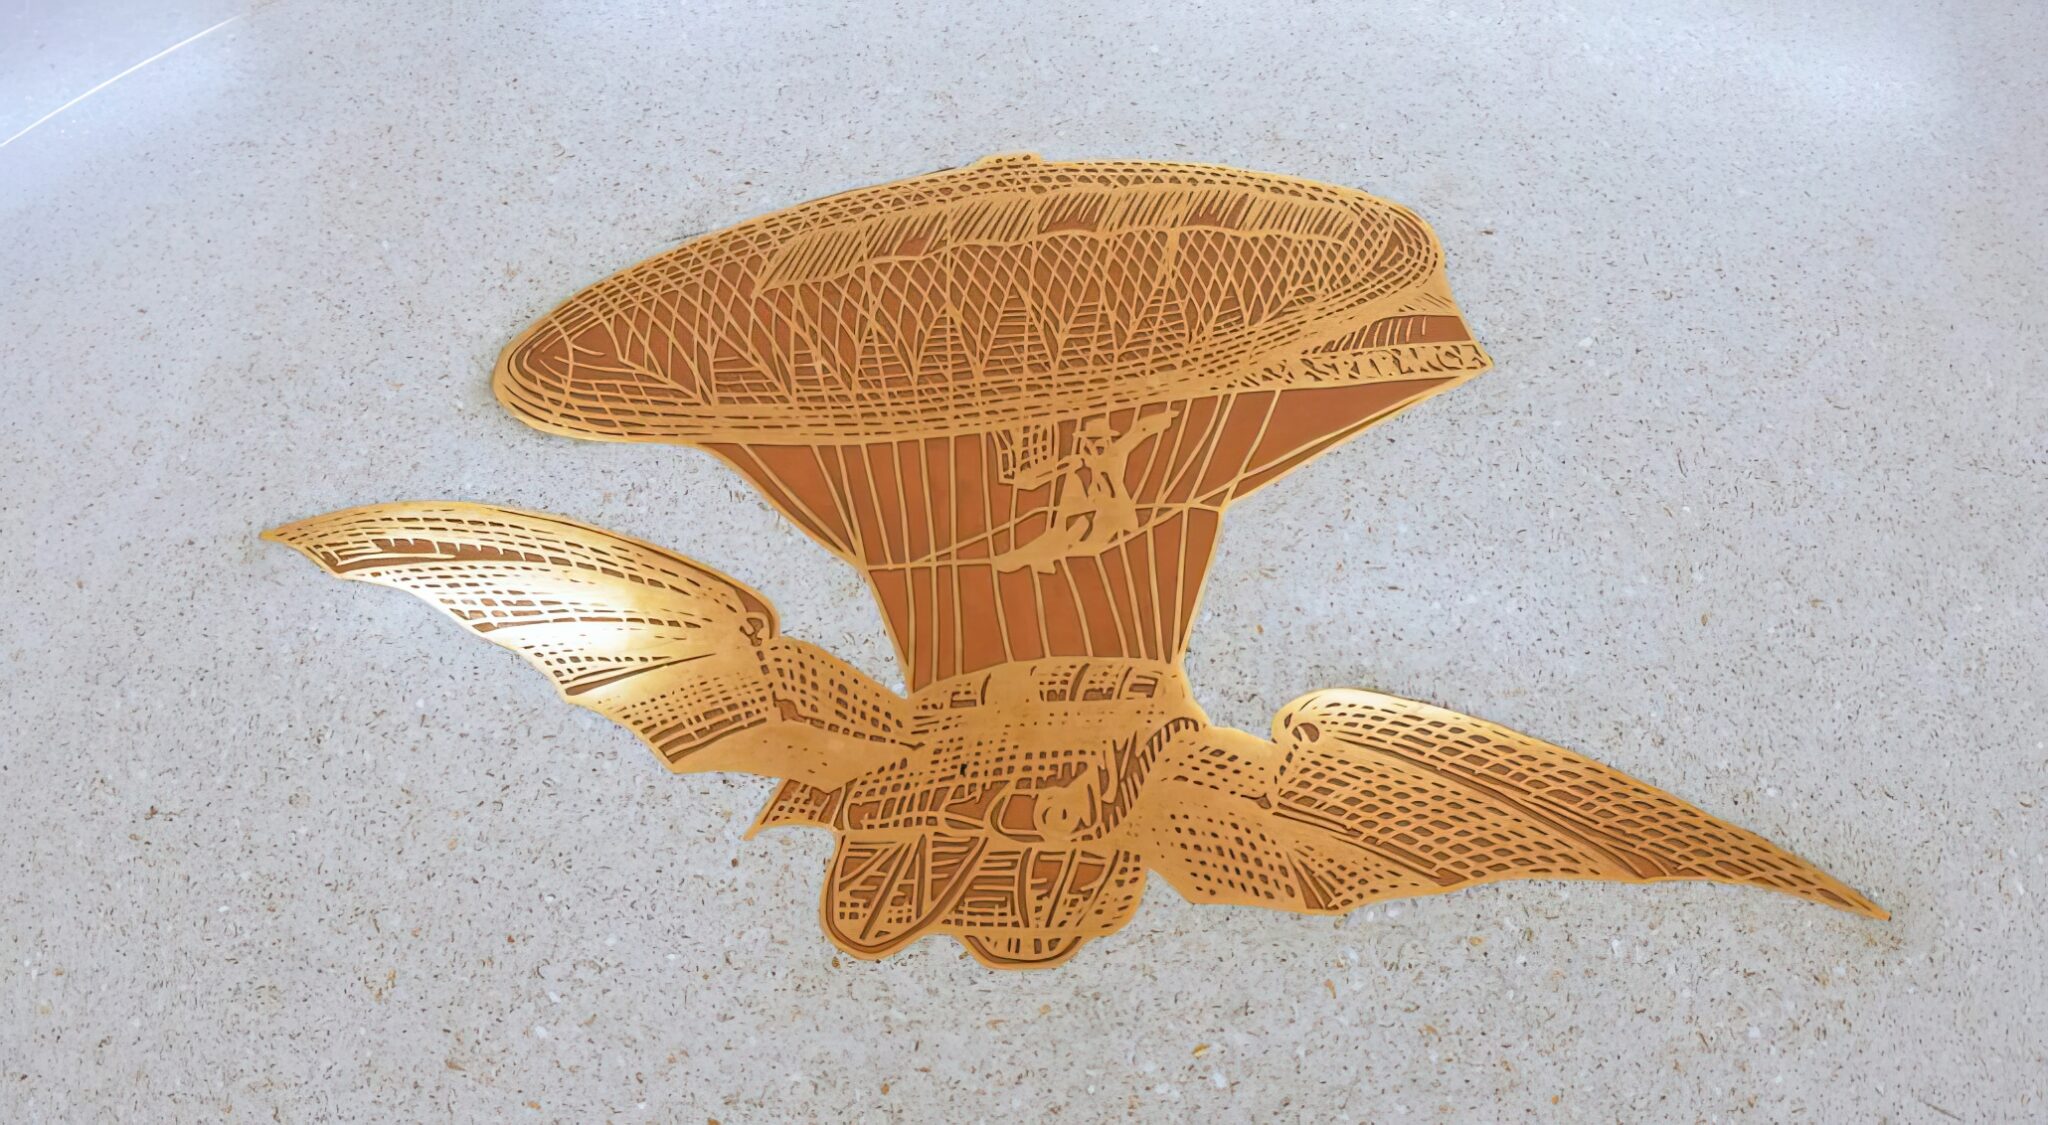
Some artistic floors include embeds which are fun to do. These are like relief sculptures, objects set into the floor before the epoxy is poured, positioned at the exact height of the finished floor surface so that grinding will bring everything flush. Most embeds are fabricated off site. For embeds with sculptural relief, clear epoxy is poured into them off site before they arrive, bringing the surface flush without creating a trip hazard. These can be brass or aluminum shapes, resin-filled castings, or found objects: fishing lures, plastic insects, shells, almost anything that can bond to an irregular edge that the epoxy can grab onto.

Not everything works as an embed. Glass marbles, for instance, are too round and smooth for the epoxy to grip. There is one floor I know of that used marbles and then they began to pop out later on (not my floor!). The embeds should have an irregular edge that the epoxy can latch onto.
Sampling

Before any epoxy is poured into the full floor, samples are made with the exact color of epoxy and actual aggregate recipe, which is then ground and polished to the finished surface spec. This is where colors are confirmed, aggregates evaluated, and the relationships between fields of color tested at actual scale.

My color choices are made from Pantone chips, not a computer screen. I work out the color harmony by hand, selecting and arranging chips until the relationships are right, then send them to the epoxy supplier to match. Each color also requires an aggregate recipe specifying the size of chips and the materials: marble, granite, glass, recycled glass or porcelain, silver-coated aggregates, phosphorescent glass, and more. The aggregate recipe is as much a design decision as the color itself. It determines how the surface catches light, how much depth and texture it carries, how it reads from across the room versus underfoot. It is always interesting to experiment with more unique aggregates, often I look at ideas from the geographic area. I have used seashells on a floor in Florida and crushed stone from a quarry near another floor in Minnesota, to bring the actual material of the landscape into the floor.

SInce the samples are the same materials, when they come back from the shop with the epoxy ground and polished to its finished surface, then the palette of colors is approved for its harmony and balance. Two colors that seemed right in isolation may need adjustment when they sit beside each other in the floor. The sample resolves all of that before fabrication proceeds.
Preparing the Floor
Before any strip is set or epoxy poured, the concrete substrate has to be prepared. The first step is moisture testing for excessive moisture in the concrete can cause epoxy terrazzo to delaminate, so the slab has to meet a minimum standard before work begins. Concrete typically needs twenty-eight days to cure sufficiently, though additives can be mixed in to accelerate drying. Elevated floors tend to dry faster than ground floors, since air can circulate beneath them.
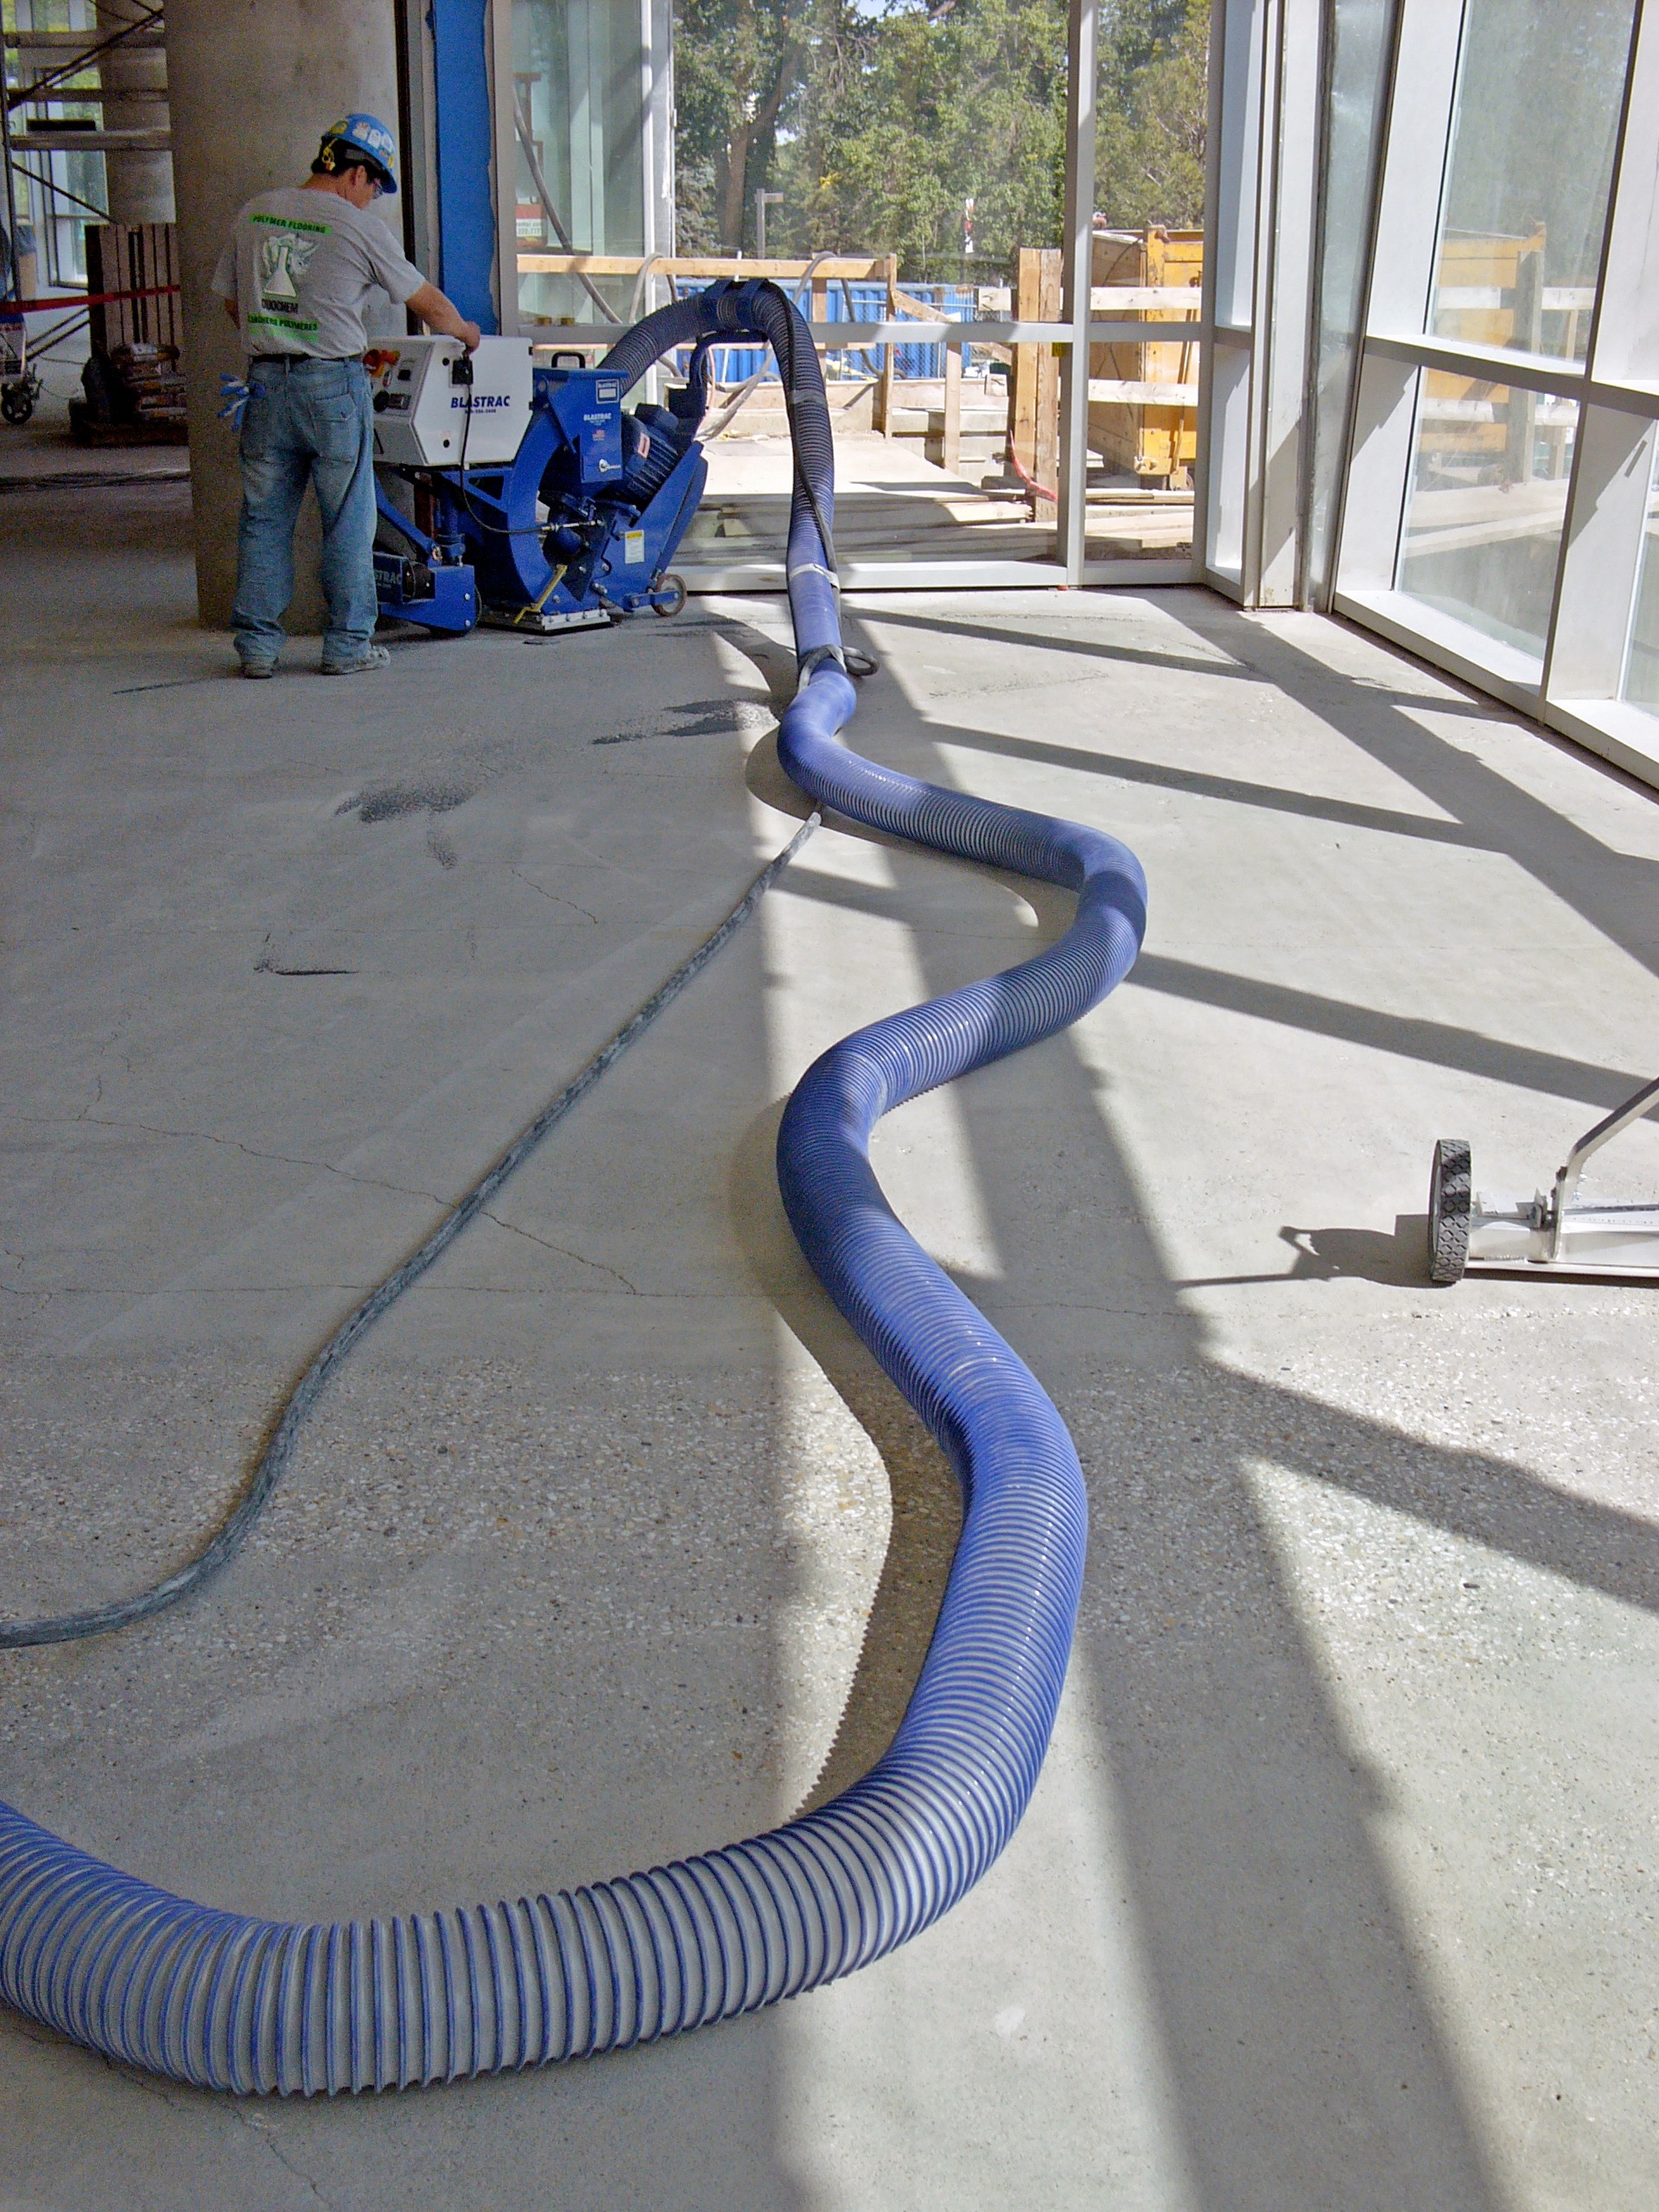
Then comes shot-blasting to level and smooth the concrete subfloor (also called blas-tracking from the brand name). This machine strips the top layer of concrete to open the surface and create a strong bond with the terrazzo above.

Next step is to mitigate any cracks that have appeared in the concrete subfloor. An epoxy emulsion with a mesh is used to do this.
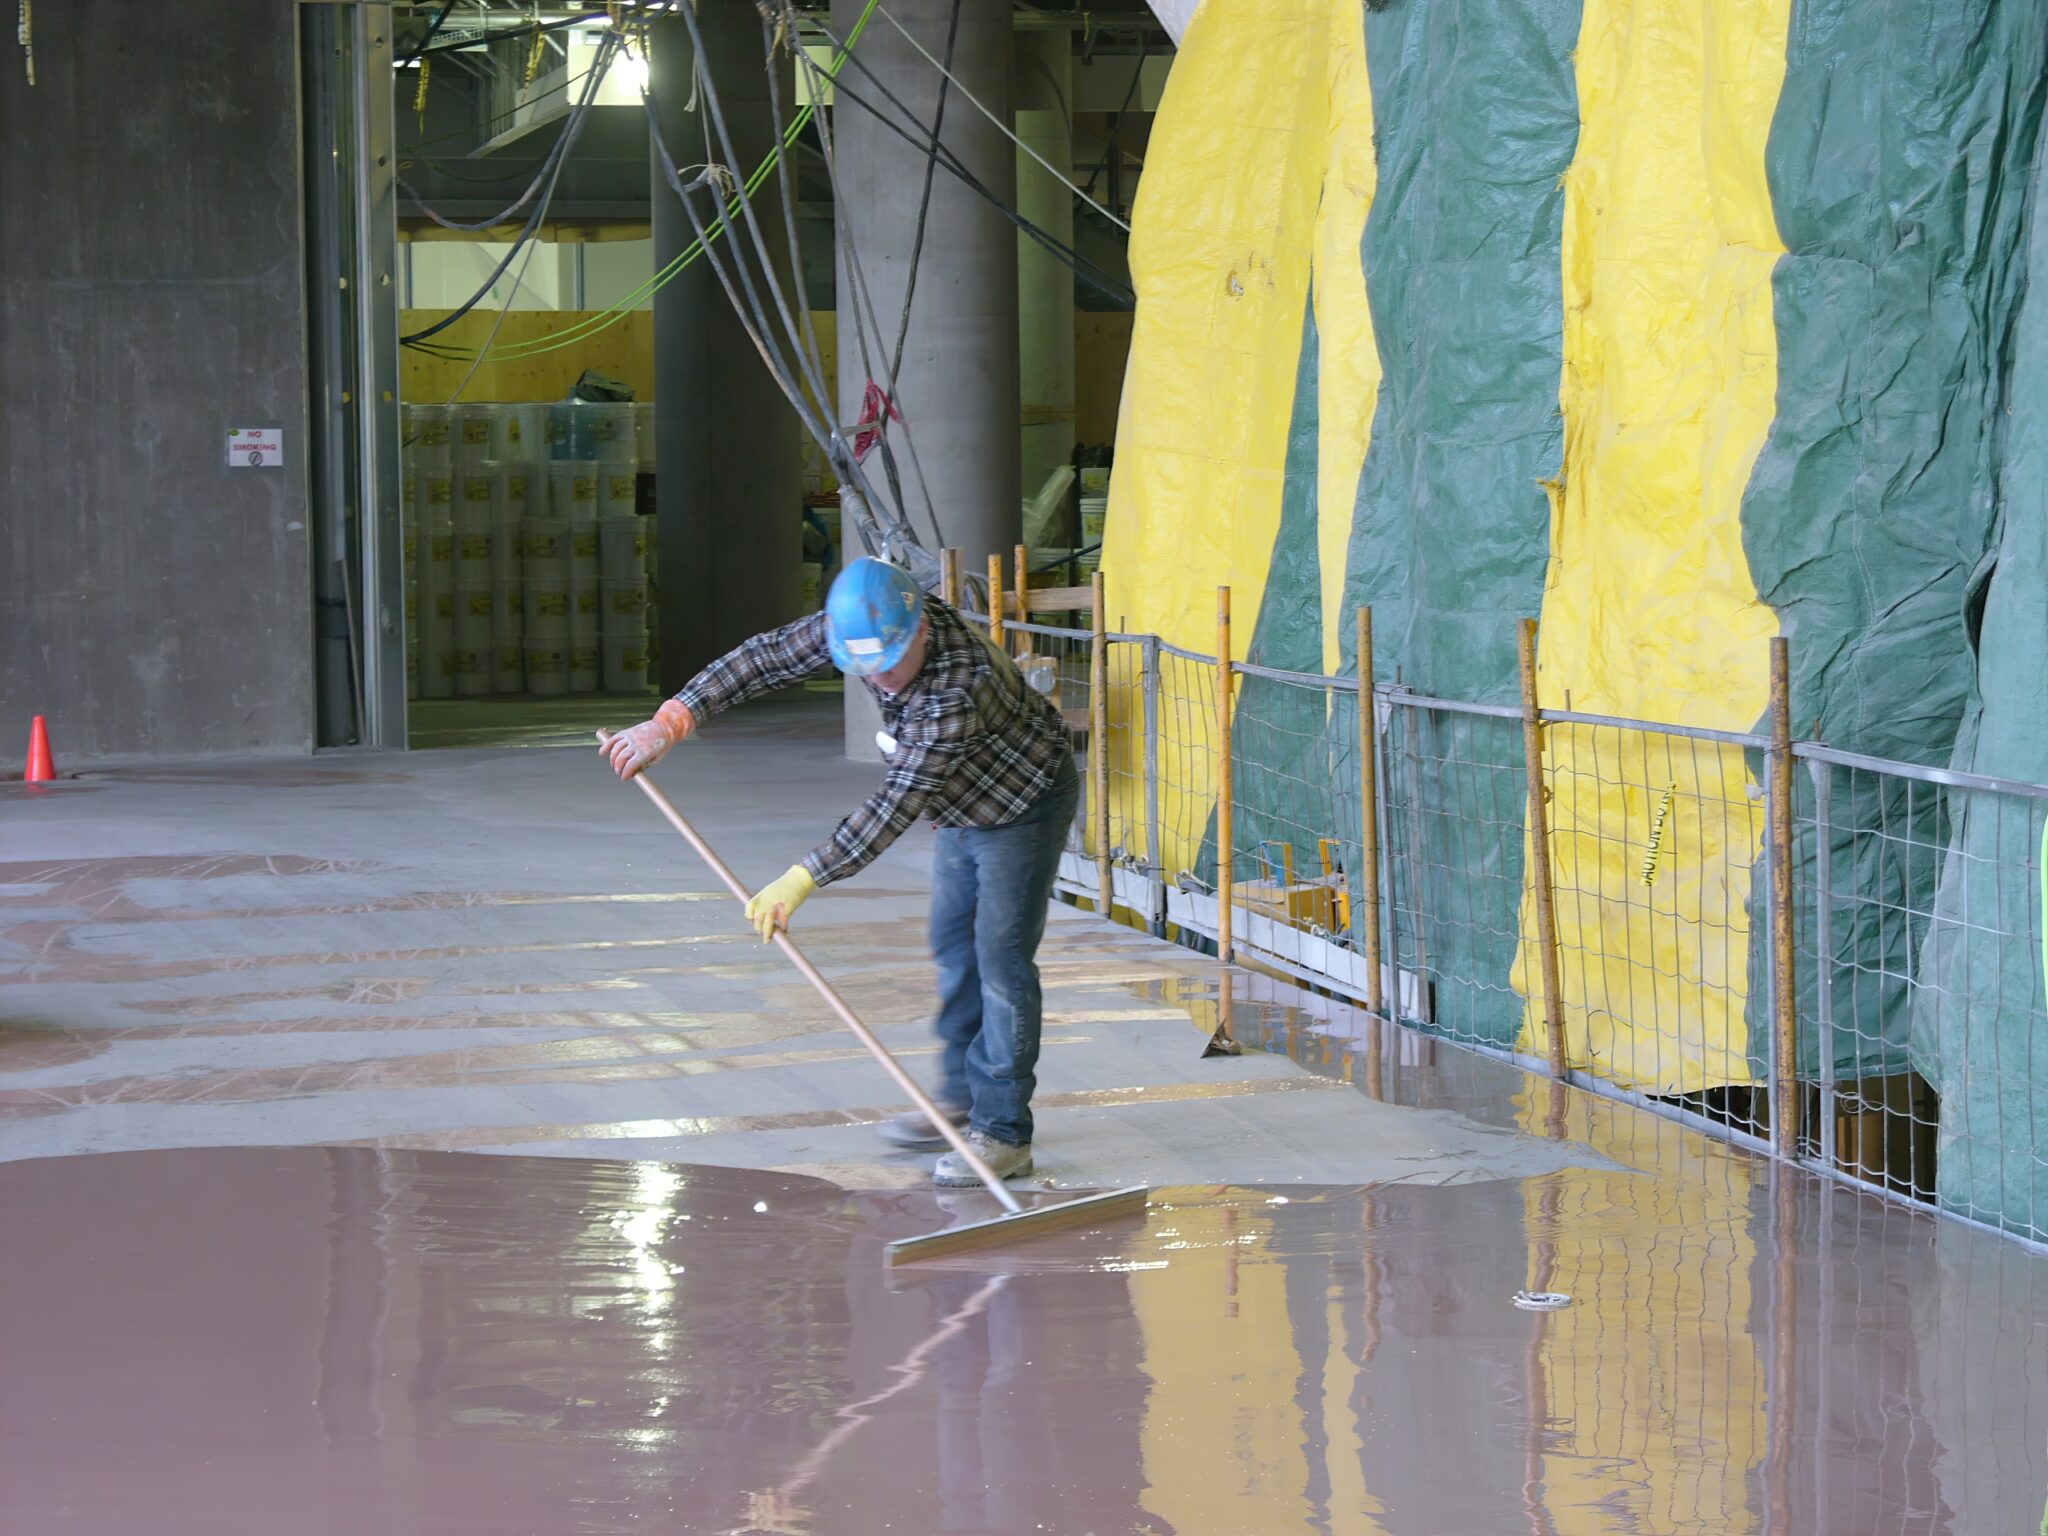
Once the slab is blasted, an isolation membrane goes down. Some contractors will membrane only over cracks in the subfloor, but for artistic terrazzo the better solution is to membrane the entire floor. This protects the terrazzo from any movement in the building, from settling to seismic activity that might otherwise cause the floor to crack over time.
Only then does the divider strip go in.
Laying Out the Strip

For an artistic terrazzo floor, laying out the divider strip is not simply a construction task starting at one end and moving across the floor, it is like making a new drawing, and you have to think of it that way, a large drawing on the floor. Site conditions change. Things need to be moved. Areas of importance, just like in a drawing, can be emphasized with how you transfer it to the floor. This is the stage where I need to be on site. This can involve laying out strip the was already pre-fabricated off-site or bending the strip on-site. All the strip is set in place and either screwed, hot-glued, and/or epoxied to the subfloor and isolation membrane.

A large floor cannot be laid from one end to the other in sequence. If each section is even slightly off, the error compounds over the length of the concourse or building, and by the time you reach the far end you can be several feet out of alignment. The strip has to be approached the way a drawing is approached, working from key points outward, checking relationships across the whole composition, not just section by section. Adjustments on site are inevitable. A column may be in a slightly different position than the drawings indicated, a wall may not sit quite where the design meets it, a door opening may shift the edge of a composition. These things don’t happen often, but they happen, and when they do the design has to be read and corrected in the moment. That is why I am there. No set of drawings, however precise, can substitute for the eye of the person who made them.

The best contractors solder every joint in the strip before the pour begins. Jeff Vanderlinden and the team at Franklin Terrazzo do this. It keeps the strip from shifting under the pressure of the epoxy and ensures the lines in the finished floor are exactly where the drawing said they would be.
Pouring

Before any epoxy is poured, I review the entire strip layout on site. Once the pouring begins, the drawing is permanently set in the floor.

For each color in the floor I prepare a separate drawing as a full color map showing exactly where that epoxy and aggregate mix goes. On a pour day the contractor can pin the drawing for that color to the wall on site: today is a yellow day, and everyone knows exactly where the yellow goes. On a floor with ten or sixteen colors, this system keeps a complex design from becoming confusing in the middle of construction.

Each color begins as a mix of the epoxy resin combined with hardener and the specified aggregate recipe. The aggregate is measured and blended first, the colors and materials combined until the mix is consistent throughout. Then the epoxy is added. What goes into the floor is exactly what was approved in the sample with the same proportions, the same materials, the same recipe.

Pouring proceeds color by color. It helps to begin with the smallest enclosed shapes first, since these are the most precise and the easiest to keep clean. Keeping the edges of the strip clean as the epoxy goes in is critical, as a smeared edge means a blurred line in the finished floor, and the lines are everything.
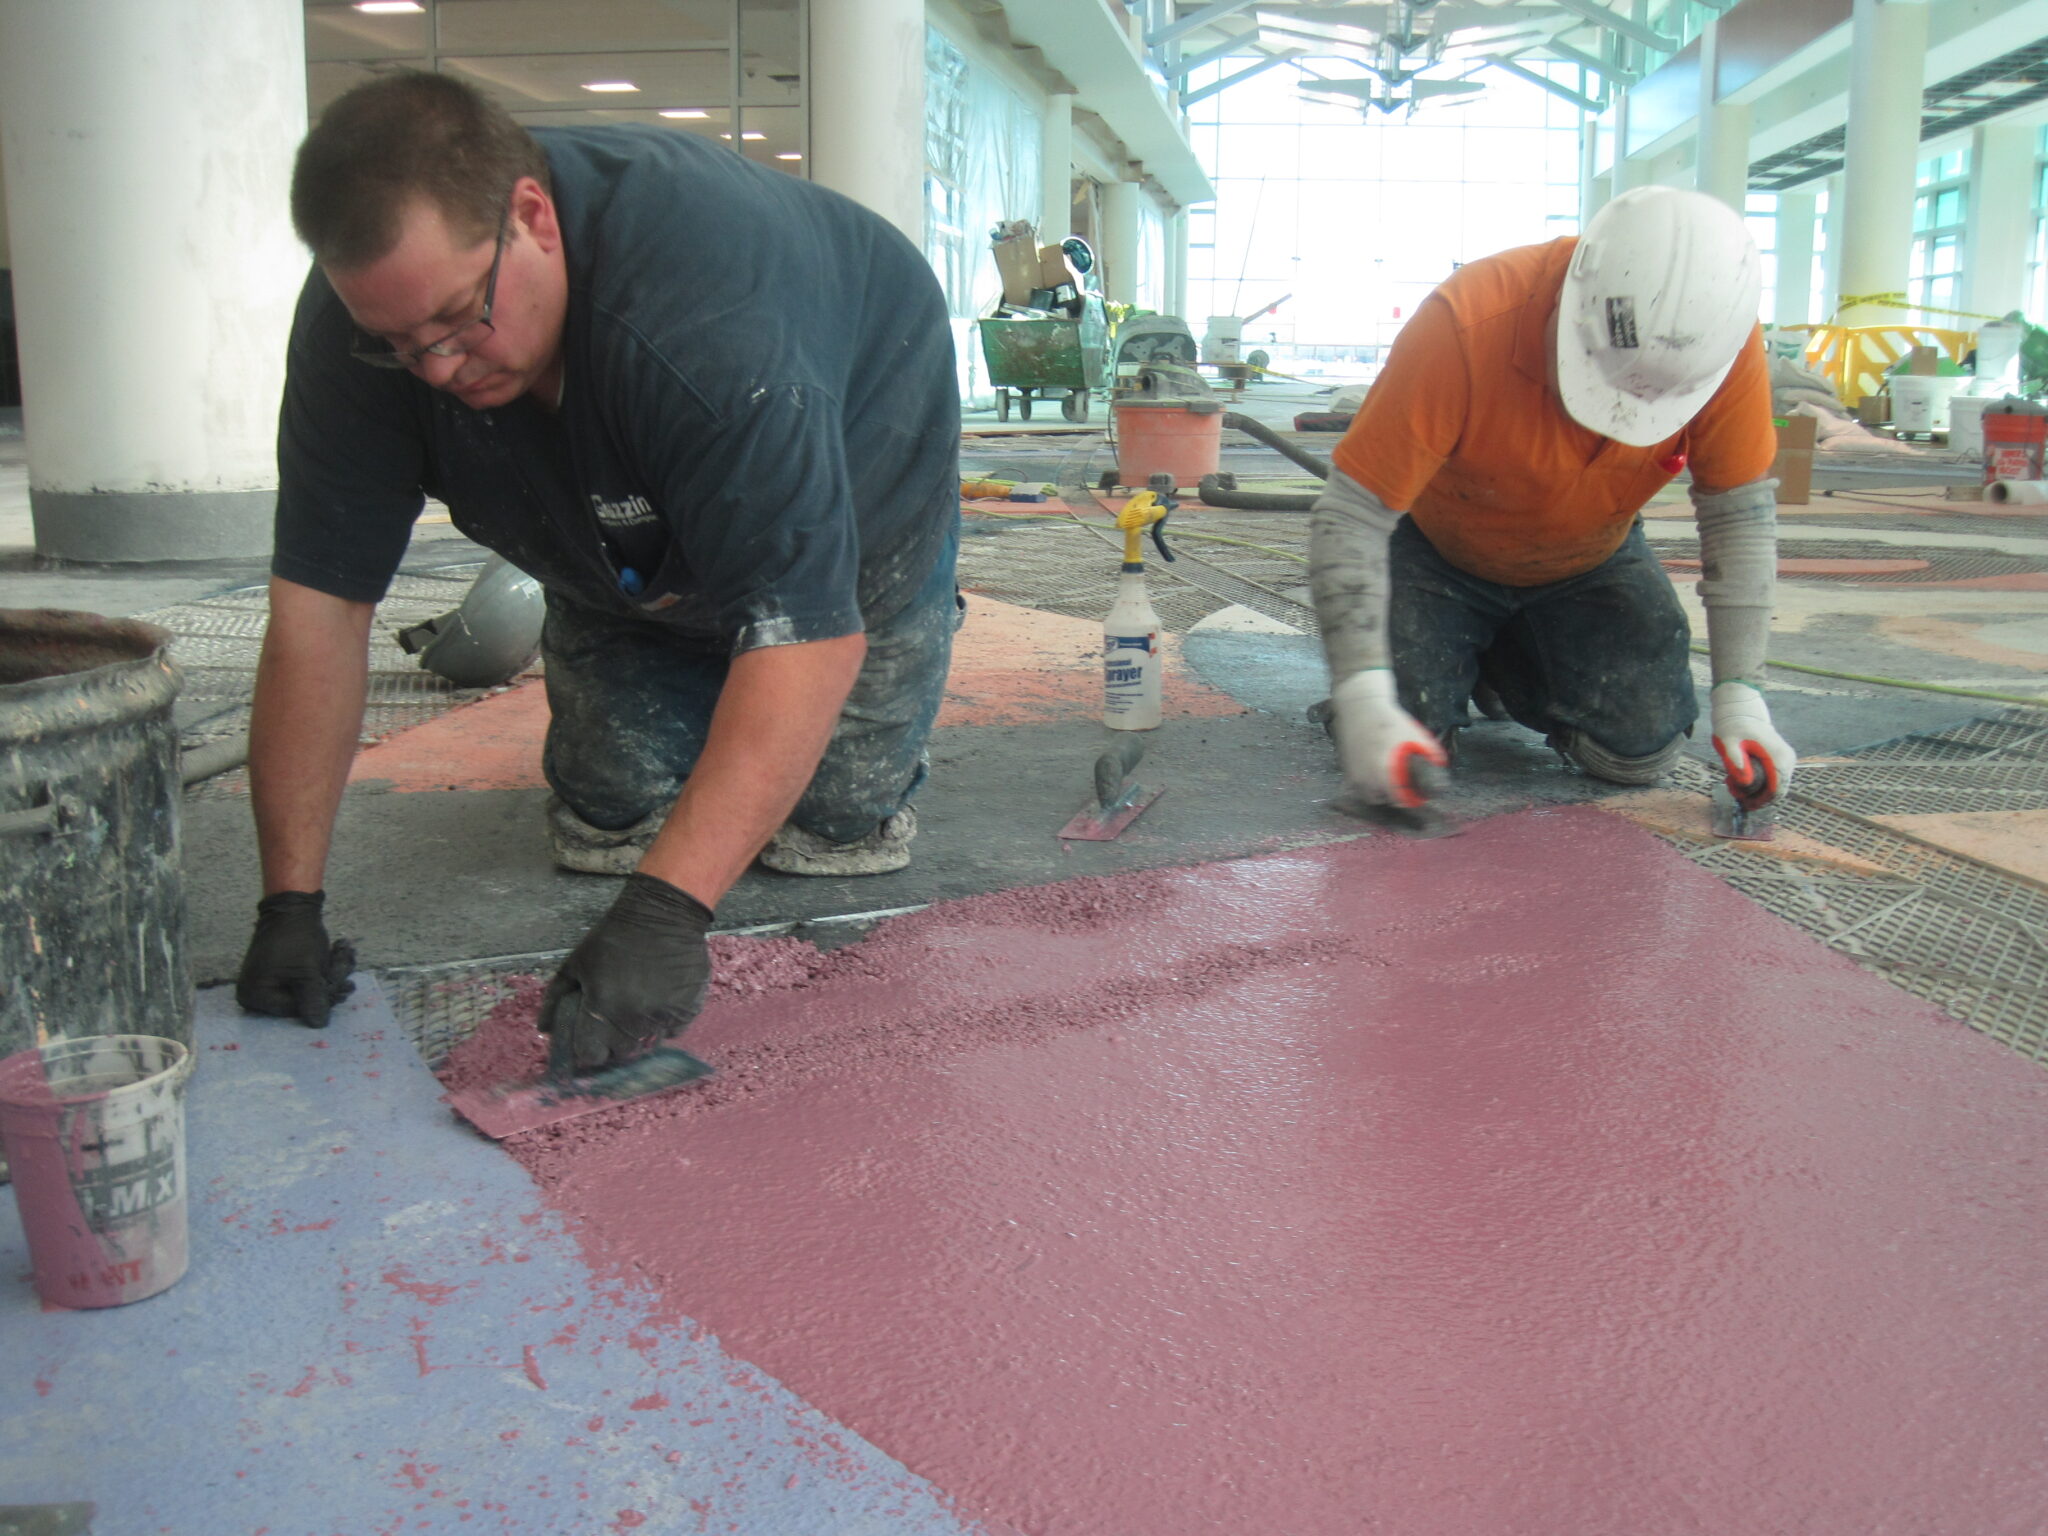
Another technique used during the pour is seeding which is broadcasting specific aggregates by hand onto the wet epoxy to increase their density near the surface. Unlike divider strip, seeding produces no hard edge. The aggregate disperses naturally, creating subtle or dramatic changes in the surface that soften and harmonize with all the precise lines of the strip work. At Fort Lauderdale, we seeded mirror and mother-of-pearl shell along certain areas of the floor to create the effect of foamy waves rolling up along the beach.

Grinding, Grouting, and Sealing
Once the epoxy has cured, the grinding begins. The grinders used for terrazzo are manufactured in Watertown, South Dakota, two hours up the road from my studio. These grinders are fitted with industrial diamond tooling that represents roughly $80,000 worth of diamonds on a machine. They move across the floor in progressive passes, each one using a finer grit than the last. The first pass is the most course to cut throuhg the rough surface, then gradually finer and finer grits are used, until the polish. The marble, the glass, the stone slowly begins to reveal itself. The floor that was raw and opaque begins to become luminous.

The grinding is where the floor gives up its secrets. Some embeds disappeared entirely under the epoxy pour and are revealed only now. Others were visible throughout. Either way, it is the grinding that brings everything to the same surface, revealing the final relationships between color, line, and object. The whole process of finishing a terrazzo floor is one of anticipation: as the floor is progressively revealed, pass by pass, grit by grit.

Once the initial grinding is complete, the floor is grouted with a color-matched epoxy mixture worked into any pinholes or voids left by the grinding process. Then the fine grinding continues, moving through progressively finer grits, sometimes into the thousands, until the specified finish is reached. The finer the grit, the smoother and more reflective the surface.

Sealing is the final step. A penetrating sealer is applied to protect the surface and bring the floor to its finished appearance. On a highly specified floor, ground to a fine grit and properly sealed, the surface can approach a mirror.

Archaeologists have found terrazzo-like floors in Turkey dating back eight to ten thousand years. The floors of St. Peter’s Basilica in Rome are terrazzo. The Venetian tradition that most directly informs what I do dates to the fifteenth century. A well-maintained terrazzo floor will outlast the building. After many years, an epoxy floor can be reground and resealed, and returned to its original finish. This is what a material looks like when it has been trusted for ten millennia.
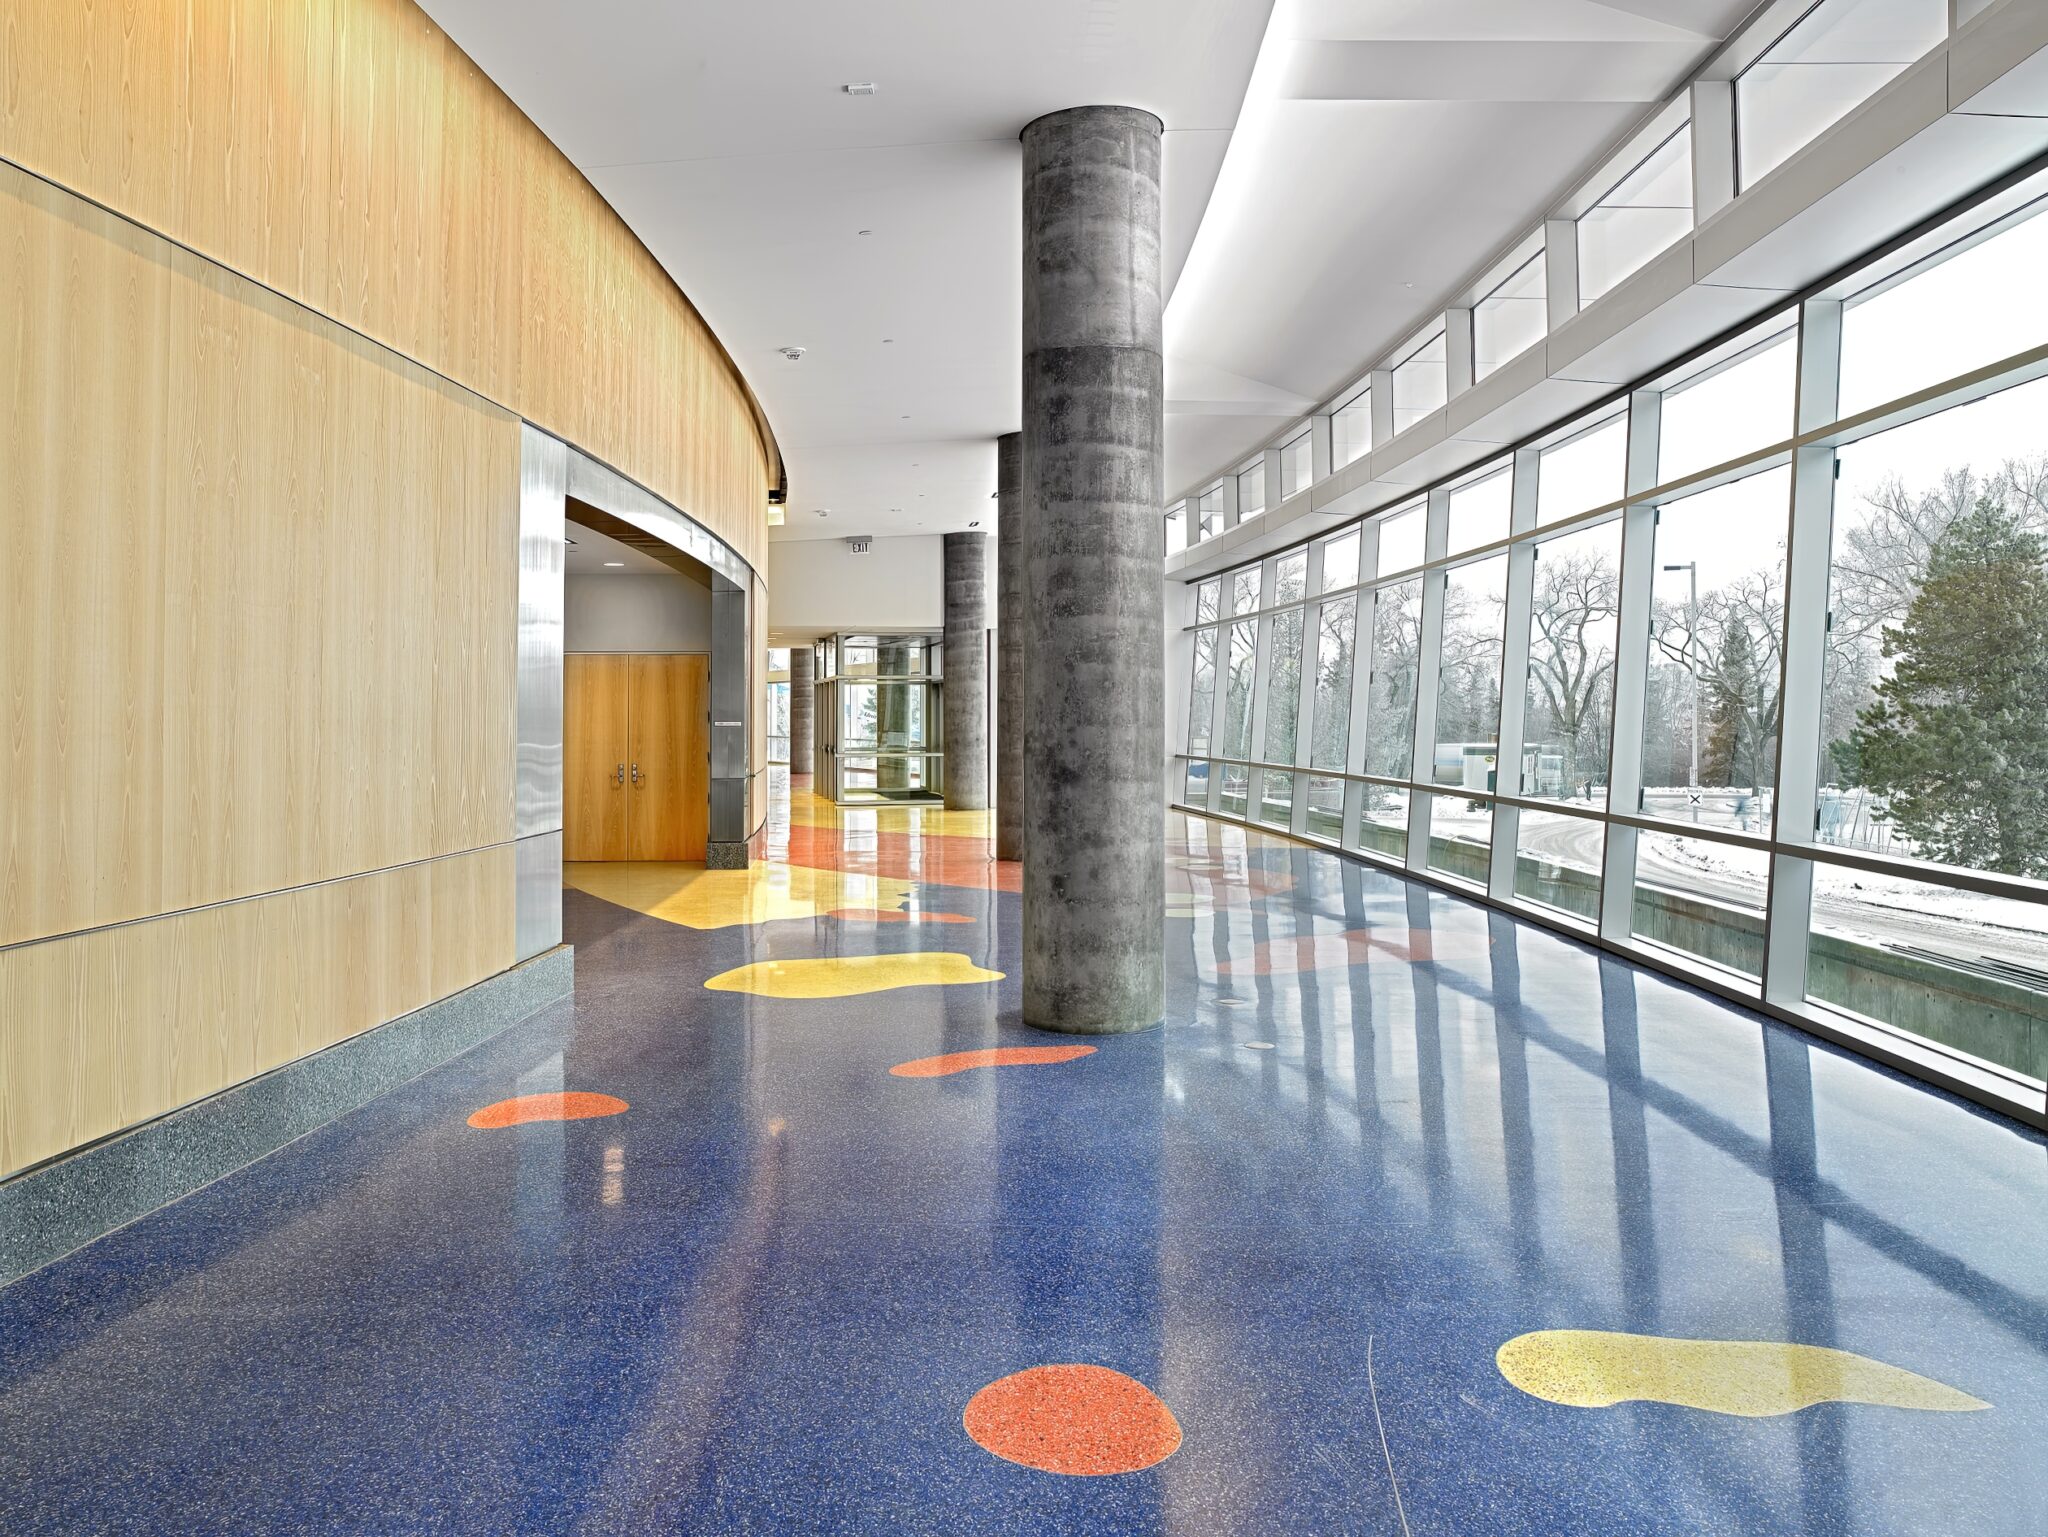
One thing I have noticed walking over a large terrazzo floor is how your emotions change, as you walk through a blue section of floor to a predominantly red area, for example. You notice the transition in an emotional way. There is a physical feeling to this.

And then there is the light. When glass, mirror, silver-coated aggregate, or mother-of-pearl shell is in the floor, the surface is never quite the same twice. It changes with the movement of the sun across the day, and it changes with your own movement across the floor: glinting, shifting, alive. Loren Eiseley wrote that if there is magic on this planet, it is contained in water. I think some of it is also contained in light moving through stone and glass, underfoot, with the glint of the sun striking and shimmering upon the surface, like sand on a beach or freshly fallen snow in sunlight.

Artistic terrazzo is like a physical and metaphoric mirror held up to a building—one you can hold up to see what invisible relationships and connections it might reflect.
